
paska (easter bread) - small batch


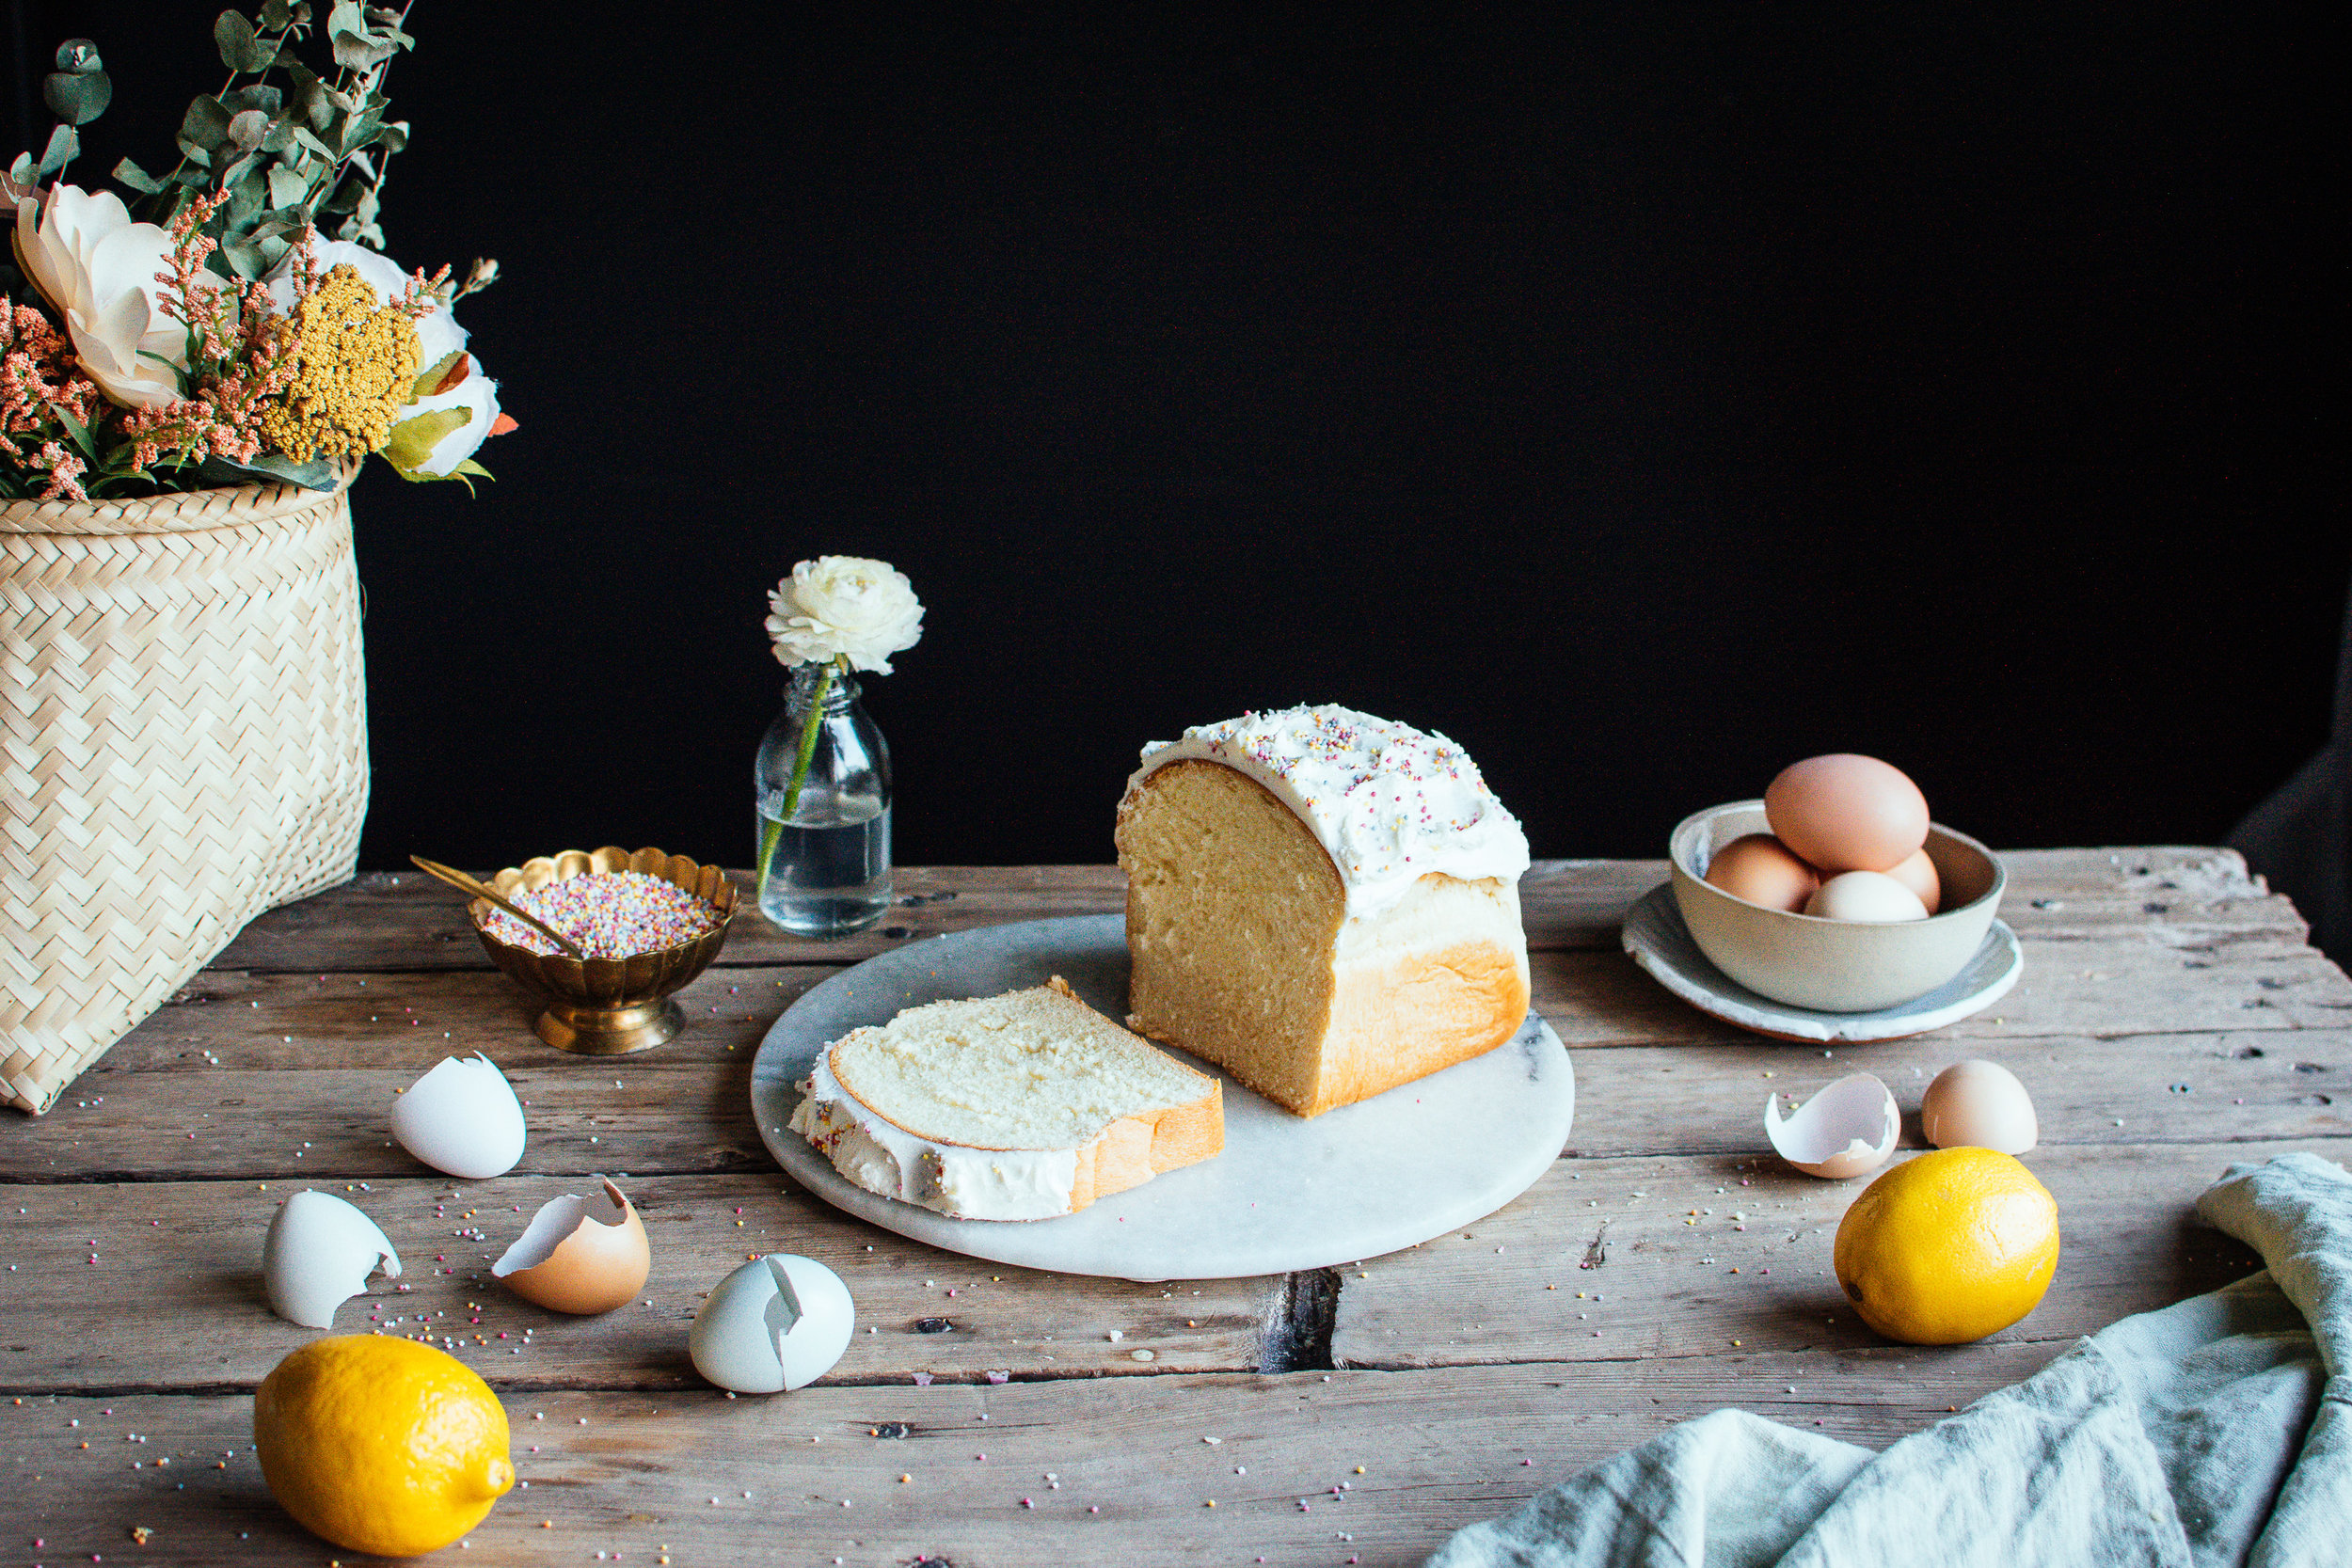
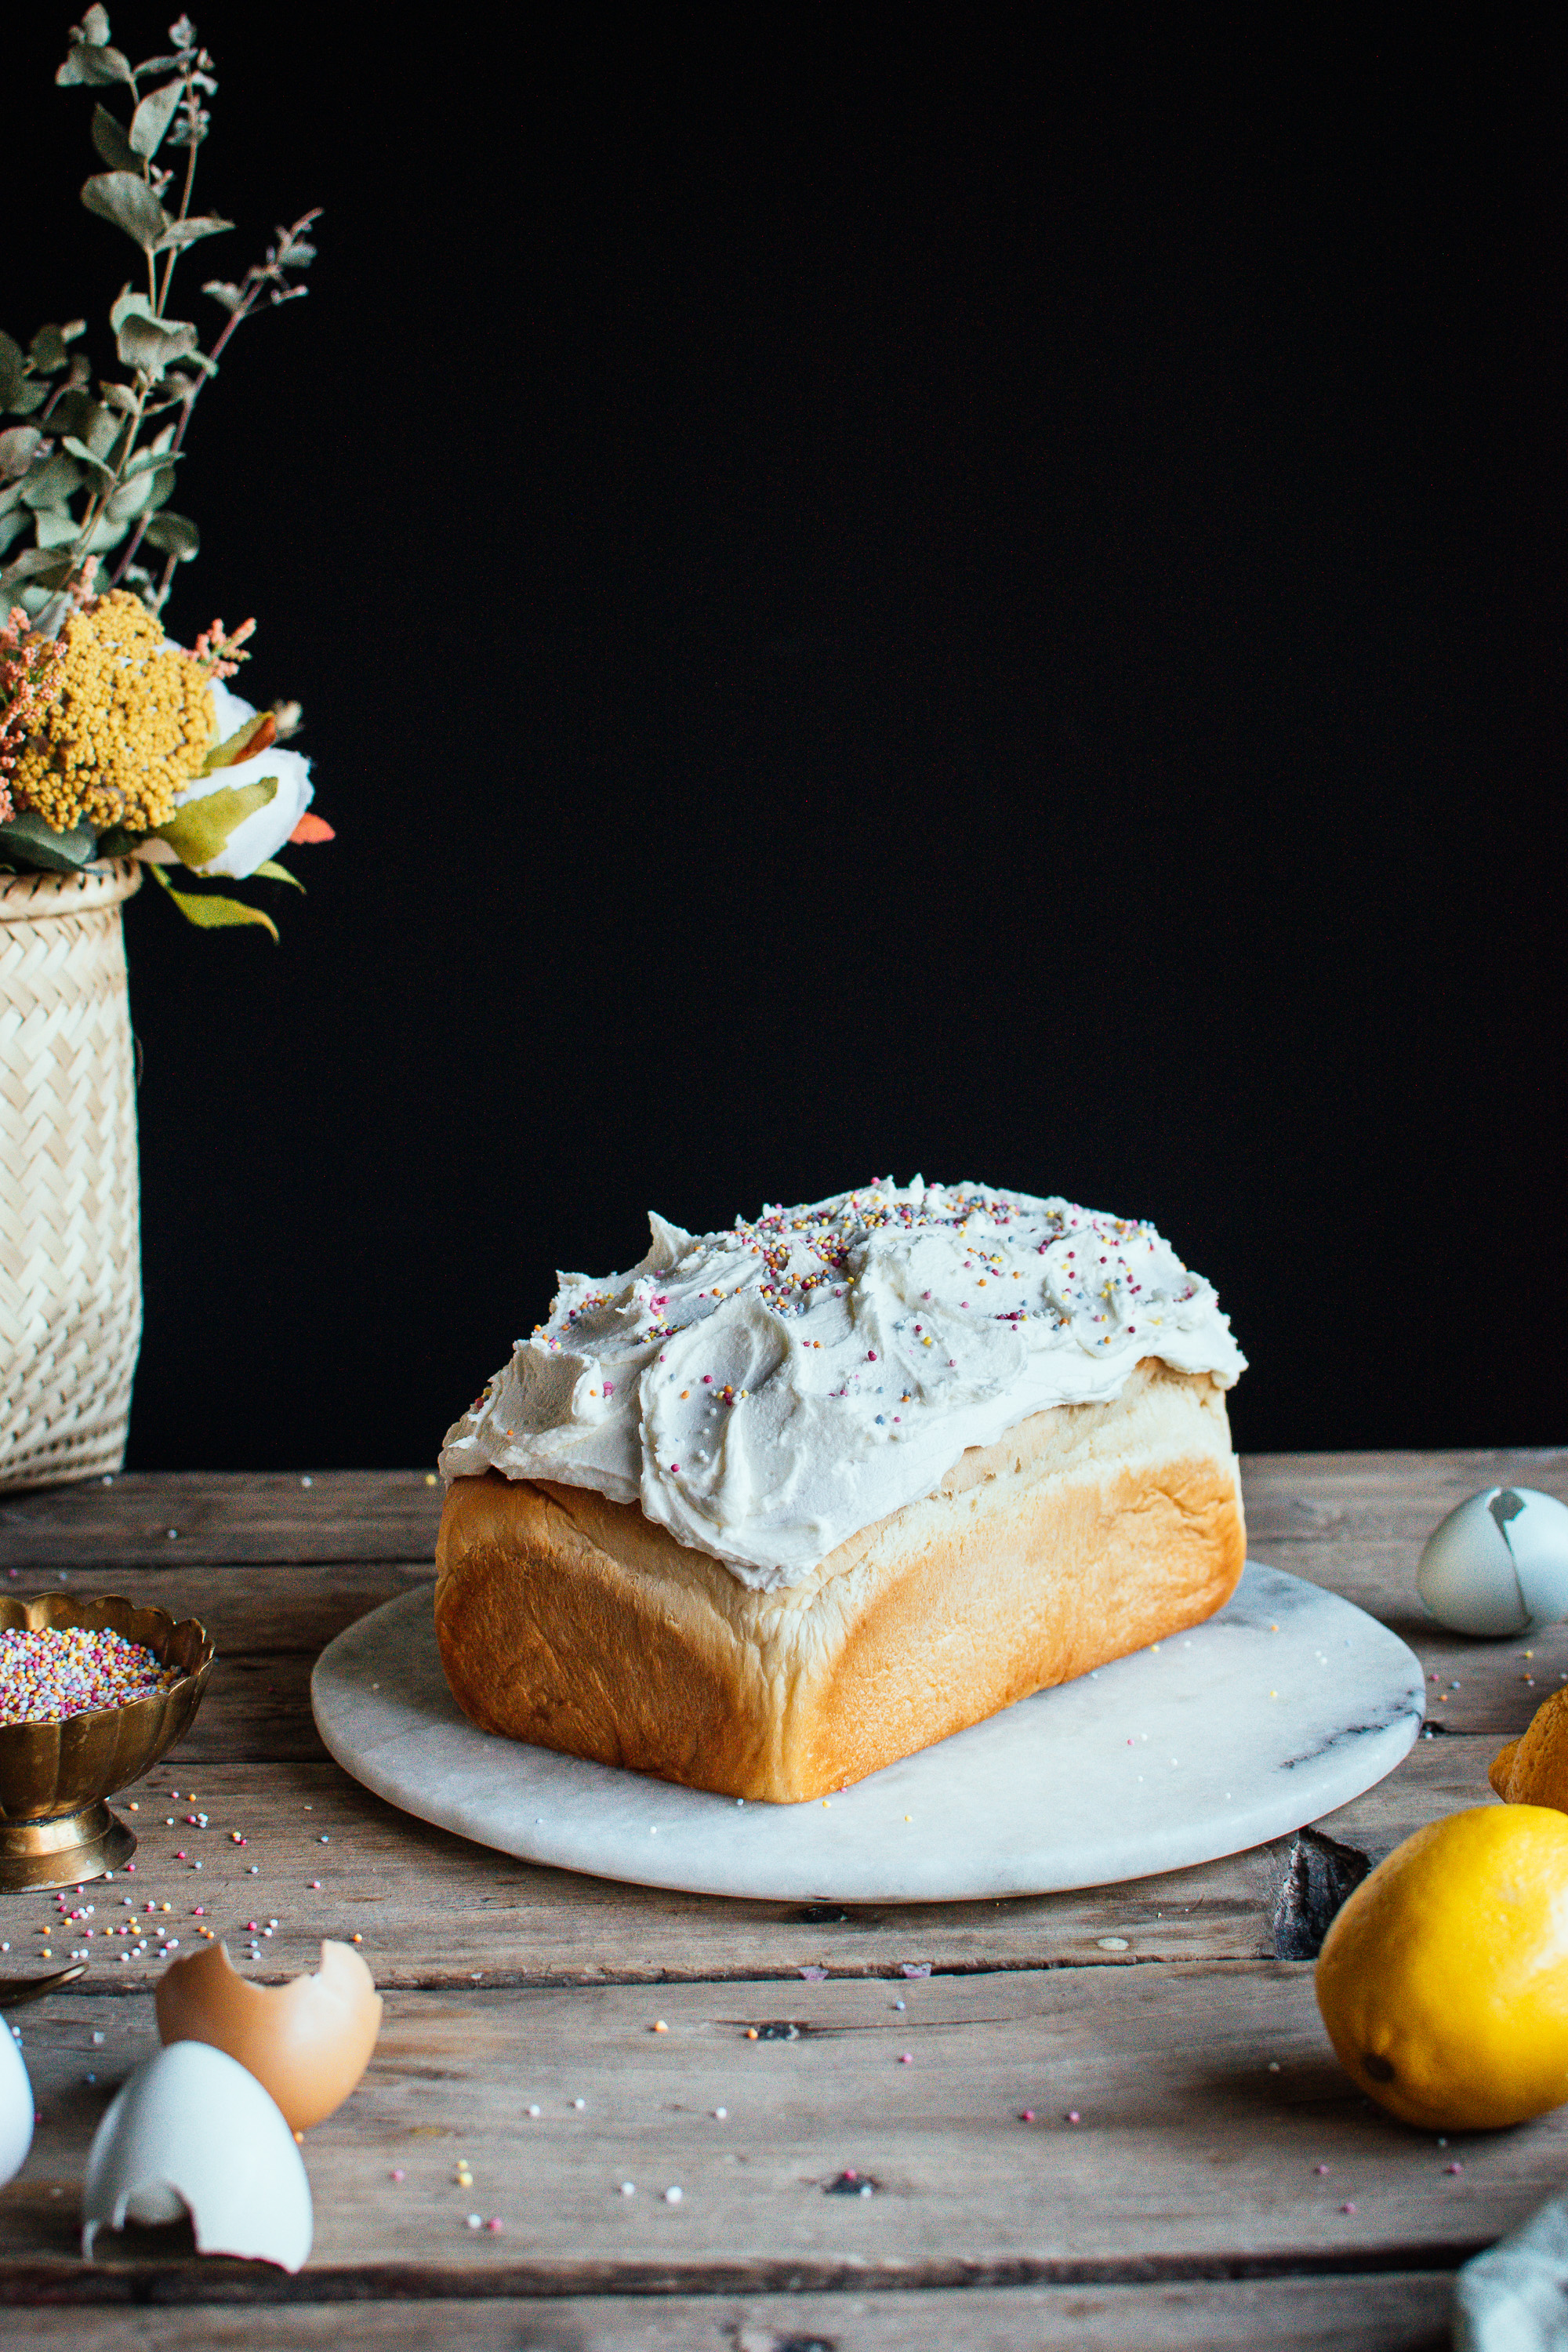
Easter is nearly upon us, and for my family that means…..paska time! Paska is a slightly sweet, slightly citrus-y bread that is made for Easter, and is often served with icing and sprinkles. Some families make loaves, some make buns, some frost just the tops, and some cut theirs open to frost the open faced sides! There’s no wrong way, truly. Our family loves simply toasting paska and eating it with butter for breakfast. Haha.
I know that I’ve shared paska on my blog before (many years ago!), but I thought I’d share an update for a smaller batch of it. Most people (including me!) have no need for loaves and loaves of paska, unless they’re bringing it to a potluck, family gathering, etc. This recipe makes a reasonable amount of paska, and only takes about 6 cups of flour, which my standmixer handled pretty well. Please note that you don’t need any special equipment to make it though! You can simply use a wooden spoon, and then your hands to bring the dough together. Easy peasy.
paska
recipe: slightly adapted from my auntie irene
yields: two 9x5 loaves, or about 2 dozen dinner rolls (will vary a bit due to the size you choose)
ingredients
1 tablespoon (8.5 grams) active dry yeast
1/2 cup water (125 ml) water
1 teaspoon granulated sugar
1 cup (250 ml) milk (any percentage is fine)
1/3 cup (75 grams) salted butter (unsalted is fine)
2 large egg + 1 large yolk (total weight came to 130 grams)
3/4 cup (156 grams) granulated sugar
1/2 teaspoon salt
1 teaspoon vanilla extract
zest of 1 lemon (about 1 tablespoon)
Juice from half a lemon (about 1 tablespoon)
6-7 cups* (720-840 grams) all-purpose flour, spooned and leveled - more for kneading if needed
*note: flour should be fluffed up before measuring, spooned into the measuring cup, and leveled off. Or use a kitchen scale if you’re unfamiliar with what bread dough should look like! Flour can get packed into it’s container, so scooping straight out of it often leads to too much flour. 1 cup flour should weigh 120 grams. Paska should be a sticky dough, so we want to avoid adding in too much flour.
directions
In a small bowl, mix together yeast, warm water and sugar. Set aside for about 10 minutes to let rise. (If it doesn't get nice and puffy, try again. If your yeast is old and not rising, you'll want to buy some new stuff!)
Add milk and butter together in a small saucepan, and heat until butter is melted. Remove from heat and set aside to cool.
In a large bowl whisk eggs until frothy. Slowly add the sugar to your eggs, then add salt, vanilla, lemon juice and lemon zest. Mix on medium until incorporated.
*Now this is when you'll want to pour the mixture into a Bosch bread mixer (not a bread machine!), or attach a dough hook to your mixer.
Add yeast mixture, as well as the butter and milk to the egg mixture.
Start adding flour, about 4-5 cups at first, and mix on medium-low until dough starts to come together. Slowly add more flour until the dough pulls away from the sides of the bowl and forms a ball. Last time I made this, I used 800 grams of flour, but this can vary with your ingredients (size of your lemon), humidity, etc. If your dough is still sticking to the bowl, add more flour one tablespoon at a time. Paska should have quite a sticky dough, so don't be tempted to add any more flour than you really need to....otherwise you'll get tough bread!
Once your dough has pulled away from the sides, keep mixing for another 8 minutes. (Or you can always knead by hand!). I prefer to do about 5 minutes in my standmixer, and then finish off by hand. Knead on a lightly floured surface, and add a touch more flour as needed to keep it from sticking to your hands.
Alternatively, knead by hand for the entire 8 minutes - it’s quite therapeutic!
Transfer the dough to a large, greased bowl, cover with a clean towel, and let rise in a warm place for about an hour and a half, or until doubled in size. Then, punch the dough down a couple times to deflate it, and let it rise for an additional half hour.
Prepare pans by greasing, or placing parchment down.
Form the dough into loaves or buns, and place onto the pans. For buns, I pinch of the dough in about 60 gram sections (I used a kitchen scale at first to get a feel for the size). Remember that they’ll rise again, as well as rise in the oven, so to make them a bit smaller than what you’d like them to end up as. To form each bun, I pull the sides of the dough together to form a seam at the bottom, turn, pinch again, and repeat until you have a smooth ball with a small seam at the bottom. This will make sense when you start forming each ball. You can set the seam face down on the counter, and place your hand over in a claw shape (not smooshing the bun), and gently move your hand in a circular motion to help round out the bun.
Forming the loaves is a similar process. Fold and pinch the dough until a smooth shape forms. You can form large round loaves that sit free form on a baking sheet. Or use about 650-700 grams of dough (about 1.5 lbs) to form a loaf for a 9x5 loaf pan. Create an oval shape for the loaf pan, again pinching the dough together and placing the dough seam side down into the pan.
Allow dough to rise for another 1 or 1 1/2 hours. How do you know if it’s ready to be baked? Lightly press your finger into the dough on the side, and if the indentation stays, then the bread is ready. If it pops back out, it needs a bit more time.
Preheat oven to 325 degrees F.
For buns: bake for 12-15 minute (this will vary slightly depending on size). The tops should be nice and golden brown.
For loaves: bake at 325 degrees F for 10 minutes, and then reduce temperature to 275 degrees F for 15-20 minutes until the tops are nicely brown.
Allow to cool for 5 minutes, and remove from pan and place on cooling racks.
Serve frosted with sprinkles, or toasted with butter.
Store in an airtight container for a few days, or freeze. Slice bread prior to freezing for easy serving later if you just want one slice at a time.
Notes:
As always, I recommend trying a test bun to see how your oven bakes. You can always cut one open to see if they’re gummy inside.
Baking time will vary with the type of pan you use (light vs dark, thin vs thick, etc)
Oven temperature can vary a bit - I always recommend getting an oven thermometer to hang inside (my oven runs 50-100 degrees high!!! so this is a lifesaver for me)
Tough paska? Too much flour or overbaking could be the culprits.
Gummy paska? Underbaking is likely the problem.
Paska freezes very well, and is the best way to keep it fresh if you want to make it a few days ahead of time.
vanilla butter cream
recipe: Kelsey Siemens
ingredients
1/2 cup salted butter *, room temperature
2 cups powdered sugar
1-2 tablespoons milk or cream
1 teaspoon vanilla extract
*I prefer using salted butter, as I find it cuts the sweetness. Add a pinch of salt if using unsalted butter instead.
directions
In a medium bowl, mix the butter on medium high until it is nice and fluffy, and has lightened in colour - about 2-3 minutes. Add in powdered sugar (you may want to sift the sugar if yours is lumpy), 1 tablespoon cream, and vanilla extract. Mix on medium speed for another 2-3 minutes, adding more cream or powdered sugar as necessary to reach the desired consistency.
Use immediately, or keep in an airtight container in the fridge.


happy paska making!